Instructions
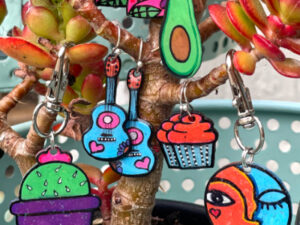
Trace your artwork onto the shrink plastic with a Sharpie. Fill in the artwork with colors using markers or colored pencils
The acrylic paint markers have worked the best for me. Lighter colors shrink better than darker colors. Darker colors shrink darker than their original color.
If you like a black line around your artwork, do it after all colors have been applied.
Cut out your image. Punch a hole in the top of your plastic where the earring or charm hardware will be attached. You may also attach a magnet or pin to the back instead.
Preheat your oven to the specifications on your shrink plastic instructions. The shrink plastic in class requires a setting of 325 degrees. Line a flat cooking pan with a piece of aluminum or parchment paper. Once the oven gets to the required temperature place the pan inside. It takes approximately 60 seconds for your item to shrink. Keep a close eye on it. Once it shrinks and lays flat wait approximately 15 more seconds. Use an oven mitt to pull the pan from the oven and press firmly onto the items with a hard flat surface such as a block of wood or something else flat and dense.
Two options for sealing.
Coat the top of your item with Mod Podge Matte, Gloss or Sparkle. Once it is dry, coat it with a clear sealer such as Fantastic Glaze or Mod Podge Dimensional Magic.
UV Resin is my favorite option for sealing the shrink art. The Let's Resin UV Resin kit is the perfect resin to learn with and everything you need is included in the kit. Coat the piece of art with the resin using a small paintbrush. Make sure to get the resin to the edge. Put under a UV light for approximately 3 minutes.